Matt's New House

Matt's New House
The Story: The Siami's were in town and Matt and his mom were driving around Wheaton looking at houses. As they were out on their hunt, a woman pulled over her car and walked up to Matt's window asking if they were looking to buy a house. When Matt responded yes, she asked if he wanted to come look at a place that they had just moved her in-laws out of. Turns out this 3 bedroom/2.5 bathroom house was just what he was looking for. So with no realtor involved and 2 months later, Matt is officially a homeowner. Aggressive? or Insane?

Tuesday, September 6, 2011

When It Rains, It Pours...

Tasks #8: A New Roof

Remember all that time we spent cleaning out the gutters back in June when Matt closed on the house?  Well the gutters were still leaking and looked pretty beat up and since we had to replace the roof anyway, we decided to put in brand new gutters as well.  At least cleaning the gutters was a good learning/bonding experience (I'm really just saying that to make myself feel better...it was not fun).  Below are several before and after pictures ("Before" on the left and "After" on the right, although it's pretty obvious which are which.)

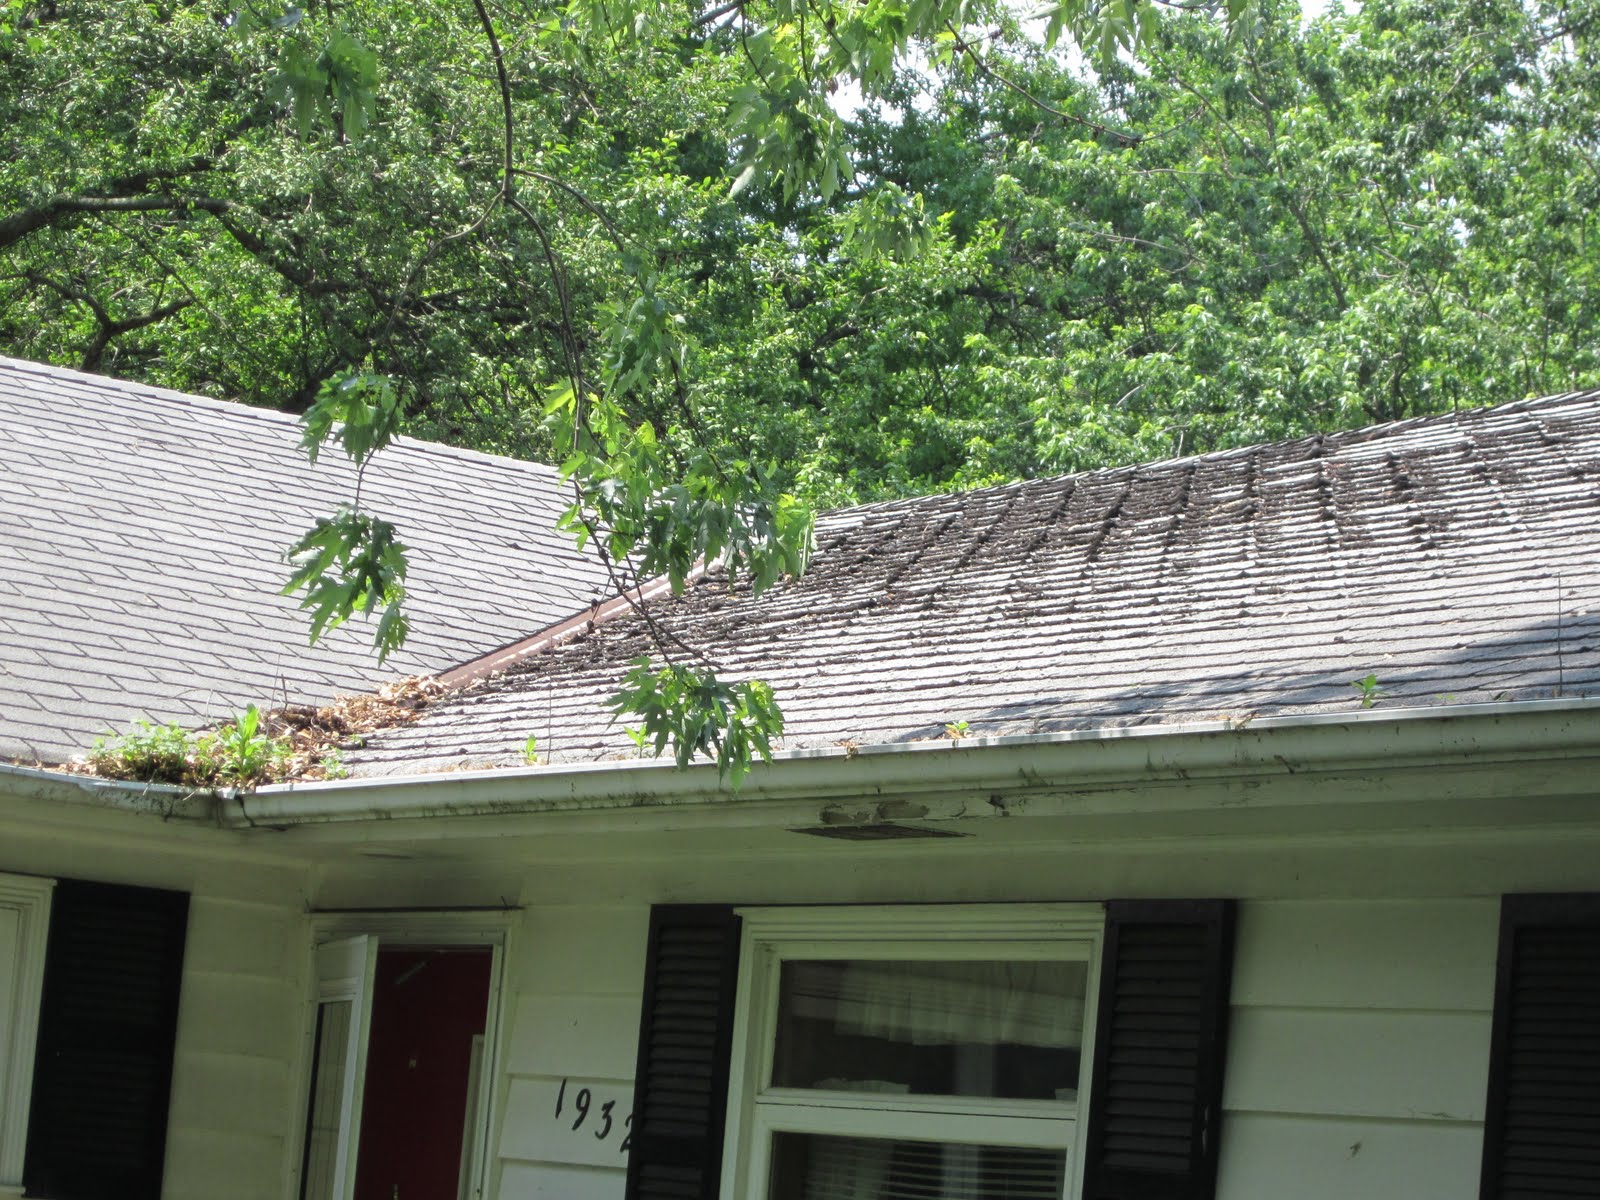
 Here's the really bad corner of the roof where the shingles were curling up.  Also take note of the soffits/fascia that were replaced.  The fascia is the wood the gutters attach to and the soffits are underneath the overhang.  We had aluminum soffits put in to reduce the amount of maintenance required. (No more peeling paint!)

 The great thing about a new roof is that it increases curb appeal, but is also helping several other aspects of the house.
- Commercial sized downspouts (they're bigger than they were before) help move more water away from the house.
- Repaired gutters and shingles eliminate leaking.
- Ridge vents aid in proper ventilation of the attic space.
- Installed gutter guards to minimize leaves that can fall into the gutters to

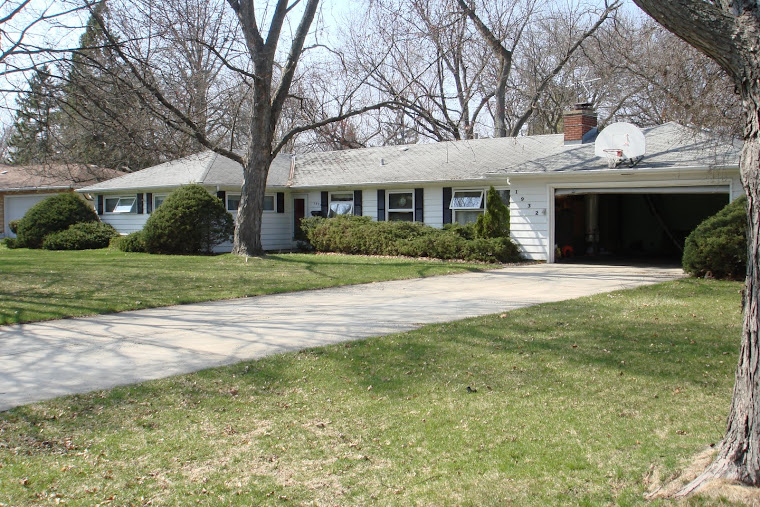
We stayed with gray shingles, but upgraded to architectural (versus 3-tab).  The difference can be seen if you look closely at the before and after photos.  3-tab shingles lay flat right next to each other, whereas the architecural shingles add more depth to the house as the overlap slightly, giving the roof some appealing texture.
Architectural shingles are slightly more expensive, but well worth the investment.  We used IKO Cambridge architectural shingles (color - harvard slate), which have a 30 year warranty.

Sunday, August 14, 2011

Removing the Old

Task #7: Minor House Updates


Remember those painted outlets that matched the old wall color?  You can buy a box of 3 prong white outlets from Home Depot for pretty cheap (less than $2 a piece).  So the steps for this were actually less complicated than I initially would have thought.  Step 1, turn off the electricity (Duh!).  Step 2, there will be two wires attached to the two-prong outlets.  Simply remove these wires and reattach them to the new 3-prong outlet.  One will connect to a screw on the top and another on the screw on the bottom.  Step 3, screw the oulet into the outlet box. Ta da!  The 3-prong outlet will naturally ground itself (this is what the 3rd prong is for) since the outlet box is grounded into the wall.


This carpet looks clean, right?  Not so much...We ripped out all the carpet in the hallway, bedrooms, and the den (aka a lot of carpet).  This was INCREDIBLY helpful for removing the old smell from the house.  The combination of painting the walls, cleaning out the vents, and removing old carpet has made a world of a difference.


One word from experience however, never rip out carpet unless you have a plan for what comes next.  This may seem obvious...In our case, we were so anxious to remove the smells, that we got a little over eager.  We have carpet installations planned for the 3 bedrooms and the den, but the hallway is still TBD.  We are still deciding on whether to re-install carpet or go with some engineered hardwoods.  Our preference is for hardwoods, we just need to finish some other projects/re-evaluate budgets, etc.

Hauling Debris

Task #6: Yard Work

The only problem with a big yard is it translates to a whole lot of yard work!  During one of our summer storms, a large limb split off from a tree and was dangling/laying in the backyard.  With the help of some of the Siami men and a chain saw, we were able to get the limb completely detached from the tree and saw it into pieces/remove it from the yard.


Mrs. Siami helped us tackle the severly overgrown evergreen bushes.  They were so overgrown that the front is actually only 4 bushes spread sideways.  We did suffer one casualty (note the empty spot) so we will eventually need to decide what to plant here.

The previous owners left a pile of wood stacked against the house.  We purchased a wood rack and moved all the wood away from the house to avoid trapping water/dirt/bugs against the house.  With the extra wood we cut up from the fallen tree, we now have plenty of wood for the winter!  If you look through some old pictures, you will see the side of the sidewalk was lined with white rocks.  With a wheelbarrow and a shovel, we moved all the rocks away from the front and into the back.  We wanted to move the rocks to make the walkway feel less cramped and because when shoveling snow, we would have ended up with lots of rocks in the lawn.  To re-use these rocks, we moved them under the wood rack in the back so no vegetation would grow up underneath the wood and we would eliminate moisture.

 Needless to say, we had a lot of bags of yardwaste after this day!

Tuesday, July 12, 2011

Week 4: A Horse (or room) of A Different Color

Task #5: Room Rennovations

Have we mentioned yet that the former owners painted everything in the room one color?  Trim, walls, nails, outlets...everything.  So in the master bedroom everything is pink.  Great for the girly girls, but not exactly fitting for Matt.  This past weekend we focused on refreshing the master bedroom.  This involved cleaning the walls, taping, spackling, sanding, painting, and carpet selection.  Can you tell from the picture where the bed used to be?  Don't worry, we're replacing the carpet.  (We went to Home Depot and picked up some samples, but have not decided on one yet.  We are currently planning on using Martha Stewart Living carpet since HD has a special on it right now.)
First task was painting prep.  While removing all nails/hooks from the wall and taping the perimeter, we discovered 2 large anchors in the wall.  There were two options here: 1) leave them in the wall and paint over them (what the former owners decided to do) or 2) take them out.  We went for option 2 and what we didn't realize, was that there was a bulge in the device that caused it to rip open the dry wall as we pulled it out.  How this got in the wall without creating any damage was a little beyond me.  After some spackle and sandpaper though, we were ready to paint.


Matt and I have gotten into a good rythmn were I cut in (paint around the edges of the wall) and Matt follows behind with a roller.  The paint we chose for the master bedroom is a greyish-blue.  For those interested, we used Flat Enamel Behr "Manhattan Mist".  When researching paint, there were a few complaints about the quality of Behr.  We, however, have no complaints so far.  Rolls on easily and evenly.

We plan to paint the trim white in the next couple of weekends.  And for those who don't know yet, Matt and I also got engaged this weekend!!  So it was a pretty busy weekend for us. :-)

Monday, July 4, 2011

Week 3: Here and there

Task #4: Yard Maintenance etc.

Fortunately the prior owners were kind enough to keep the lawn in decent shape before they vacated completely. Now that a few weeks have gone by under new ownership, the lawn is beginning to look a bit amazon-like. I figured before I upset the neighbors, I should be a good citizen and get this situation under control. After some research, a few conversations with family and friends, and a helpful review from consumer reports (and a wild goose chase to 4 different Ace hardware stores), I purchased a Toro Super Recycler self propelled mower (#20092 for those interested). It looks like I may have gotten the last one of this model in DuPage County.


Matt mowing the front yard, trying to beat the sun going down.
 The other item that needed to be seriously addressed was the wild bushes growing all around the house. My inspector had warned me that bushes too close to the house would hold in moisture around the foundation (not recommended), and pruning them back would help with this. I picked up a Black and Decker electric hedger; they run about $70 and are actually very fun to use (I had never used one).  30 minutes into pruning I had 6 scalped bushes and a huge mess to clean up, not a bad start.


Sunday, June 26, 2011

Week 2: Adventures with electricity

Task # 3: Interior Painting Prep

Note to all homeowners: when painting your walls, you should remove all fixtures and nails/screws.  Not only does it look unprofessional and tacky, but it's also a huge pain to remove them if they are painted over (such as the curtain fixture pictured here).  Don't get lazy and skip this step.  It will look much better if you don't have paint gooped up on the nails.


We had to use a flat metal scraper to break the paint sealing the outlet covers to the wall.  Since the outlets themselves were painted over, it was tricky to remove the plates.  With one particular plate, Matt pulled a little too hard when the outlets were still attached to the plate.  A huge spark coming from the outlet and half the lights in the house going out indicated that this was probably not a smart idea.  Since we still needed to get the outlet covers off, Matt developed a new technique where he used the scraper to pull at the cover while simultaneously using a hammer to insure the socket was staying in the wall. (Note: We turned off all the power to the outlets before trying again.) 


At least this caused us to learn about how to use the fuse box (old school style).  The house doesn't have a circuit breaker, but instead a box with actual fuses (yes, they still sell fuses).  All we needed was another trip to Home Depot (our new favorite store) and a quick internet search to repair the blown fuse.  The lights are back on again, but we eventually need to call an electrician to replace the box with a circuit breaker.


Week 1: All Hands on Deck (Roof and Bathroom)

Task #2: Consultations.  The roof and the master bathroom desperately need to be redone. 

The Roof:
The shingles are peeling up and need to be replaced so we had 2 contractors come out to give estimates to repair the roof.  Even though we cleaned out the gutters, they are still leaking and not moving water properly due to too many years of neglect.  While we have someone to do the roof, they will also be replacing the fascia/soffits that may be rotted and set us up with brand new gutters.  A big investment, but definitely worth it.  Unfortunately the contractor can't begin work until August.


The Bathroom:

The fixtures are out-dated and the floors need to be re-done.  The previous owners had carpet in the bathroom. Yuck!


The bathroom is abnormally small, so we met with a Home Depot Bathroom rennovation consultant to see what our option are.  We will be knocking down the wall around the shower to open up the space more.  The shower will have white subway tile with a shower "nook" to hold shampoo and sliding frameless glass doors.  We will also have a white pedestal sink installed.  We are going "white and light" to give the illusion of having a bigger space and to bring in some country/cottage style themes.  They will start construction on the new bathroom in late July. 

Week 1: On the Move

Matt hasn't wasted any time during his first week of homeownership.  We're aiming to get as much work done on the house as possible before Matt and Gurak move in at the end of July.

Task #1: Clean out gutters.  The gutters are in such bad shape that they have small plants/trees growing out of them.  Needless to say, they weren't exactly moving water away from the house very well.  On day 1 we spent 7 hours shoveling 2-3 inches worth of compost out of the gutters.  The key to this was to drag a tarp around behind us so that we didn't litter the yard with sludge.